Thomas Keller’s Brioche Deluxe – a Bouchon Bakery Recipe
Dieser Beitrag ist auch verfügbar auf:
![]() Deutsch (German)
Deutsch (German)
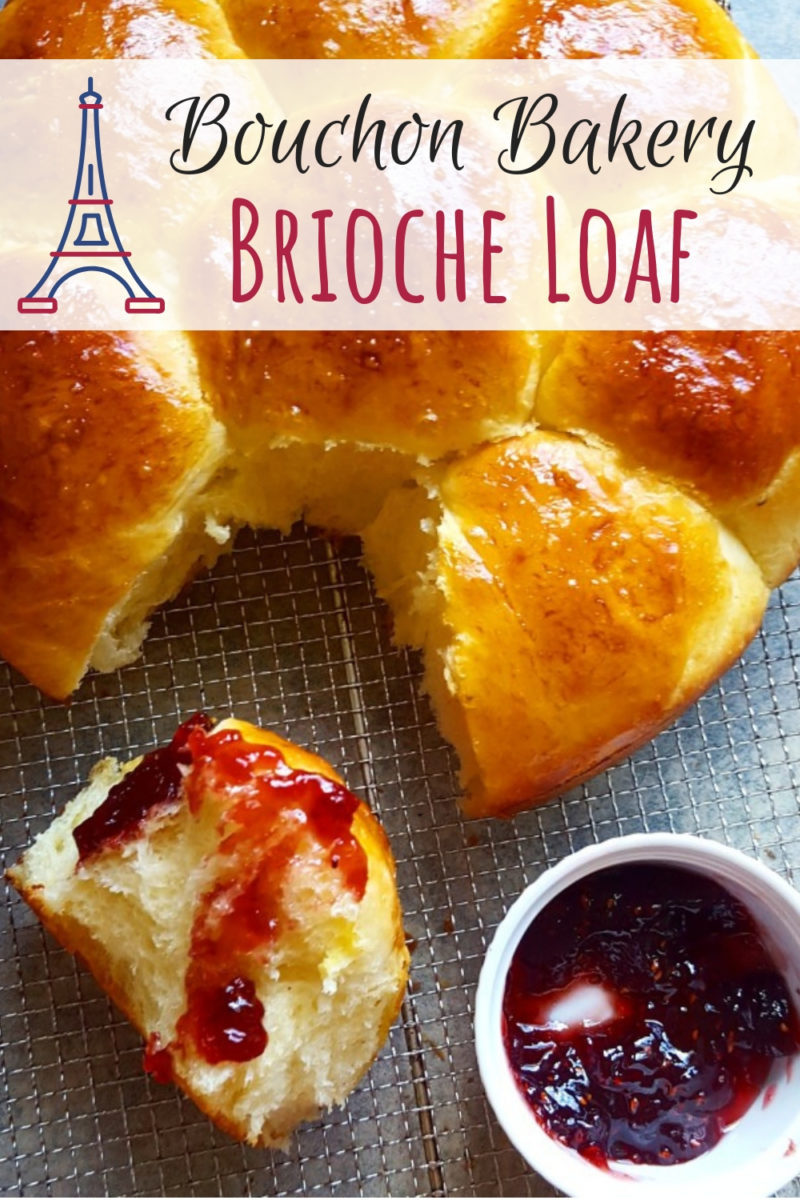

Thomas Keller’s recipe for brioche makes the fluffiest, most tender and buttery brioche loaf ever! This Bouchon Bakery recipe features special tips for kneading and fermenting the perfect brioche dough!
Is there anything more decadent than a freshly baked brioche for breakfast? Well, the truth is that most brioche recipes I’ve tried so far were not as fluffy, tender and buttery as I would have like them to be.
I mean, If I consume that amount of butter for breakfast it should be the most perfect thing ever, right? Make it worth the calories.
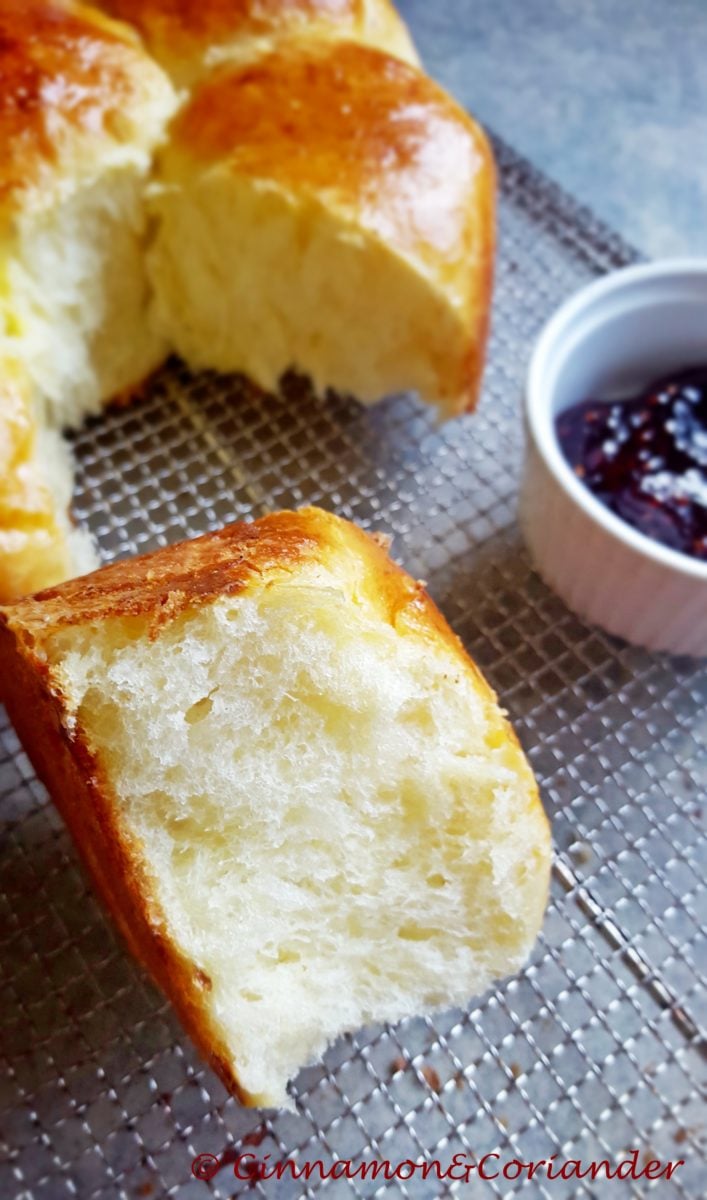
And this pillowy buttery brioche loaf , makes me forget all nutritional worries. It is sheer perfection.
I’ve tried many brioche recipes and this cold-rise brioche adapted from the Bouchon Bakery Cookbook is THE BEST! It’s one of those super precise Thomas Keller recipes, that I am obsessed with. The precision really pays, so bear with me!
Why every passionate baker should try Thomas Keller’s recipe for Brioche Loaf:
This brioche loaf has a slight tang from the slow fermentation overnight and is loaded with butter flavour. It has the same butter aroma you would expect from a freshly baked croissant. But it’s so incredibly light, airy and literally melts in your mouth.
A breakfast treat apt for angels and elves.
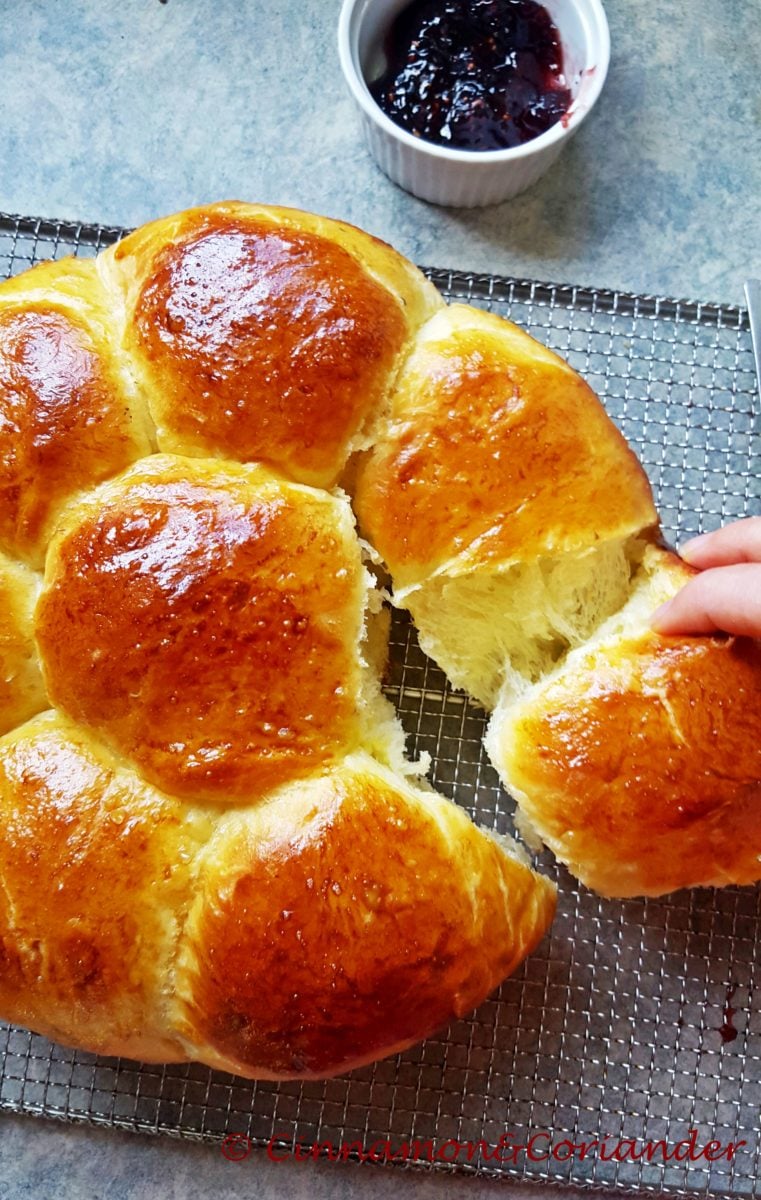
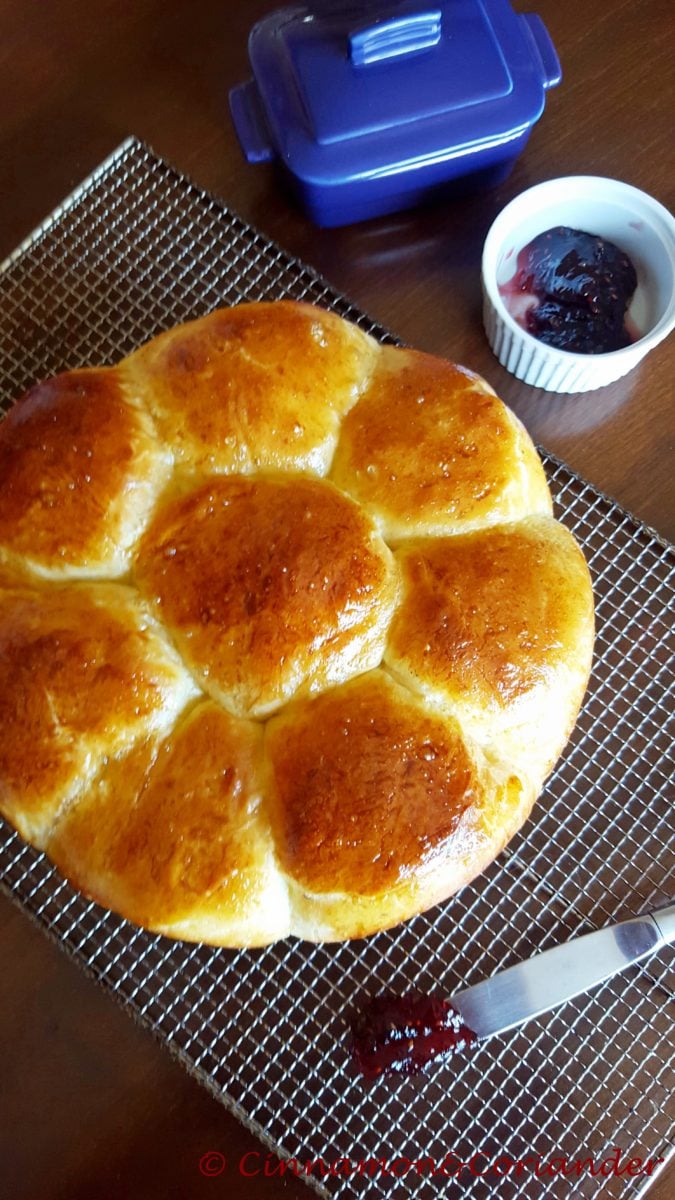
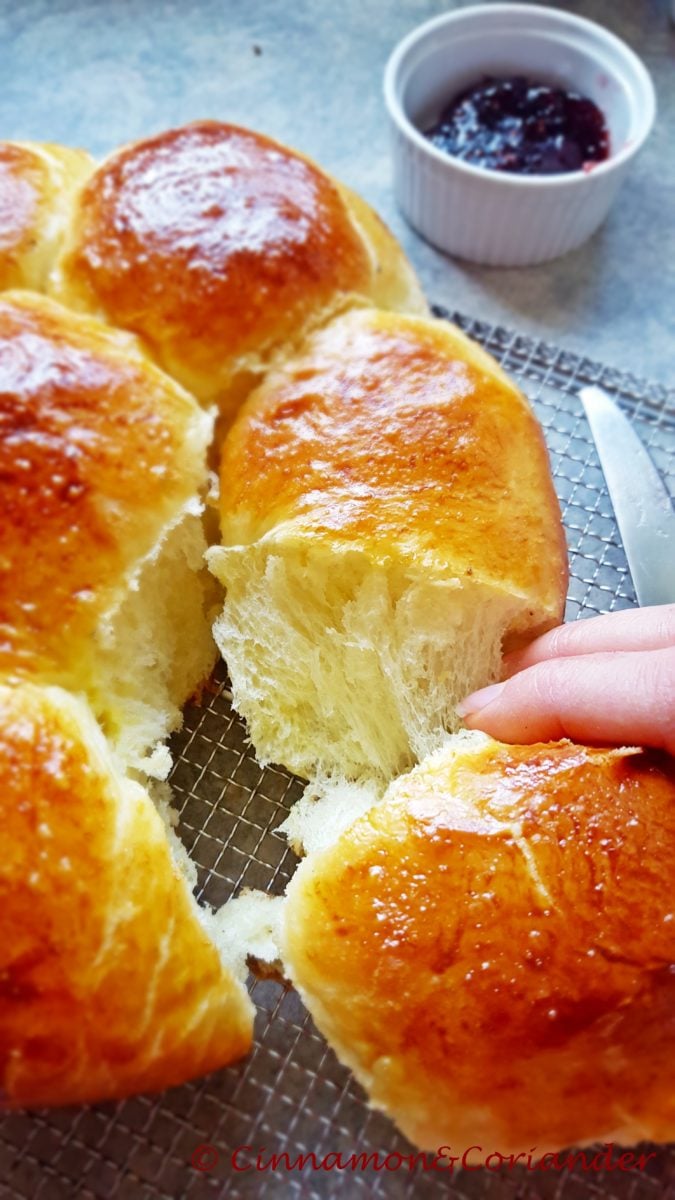
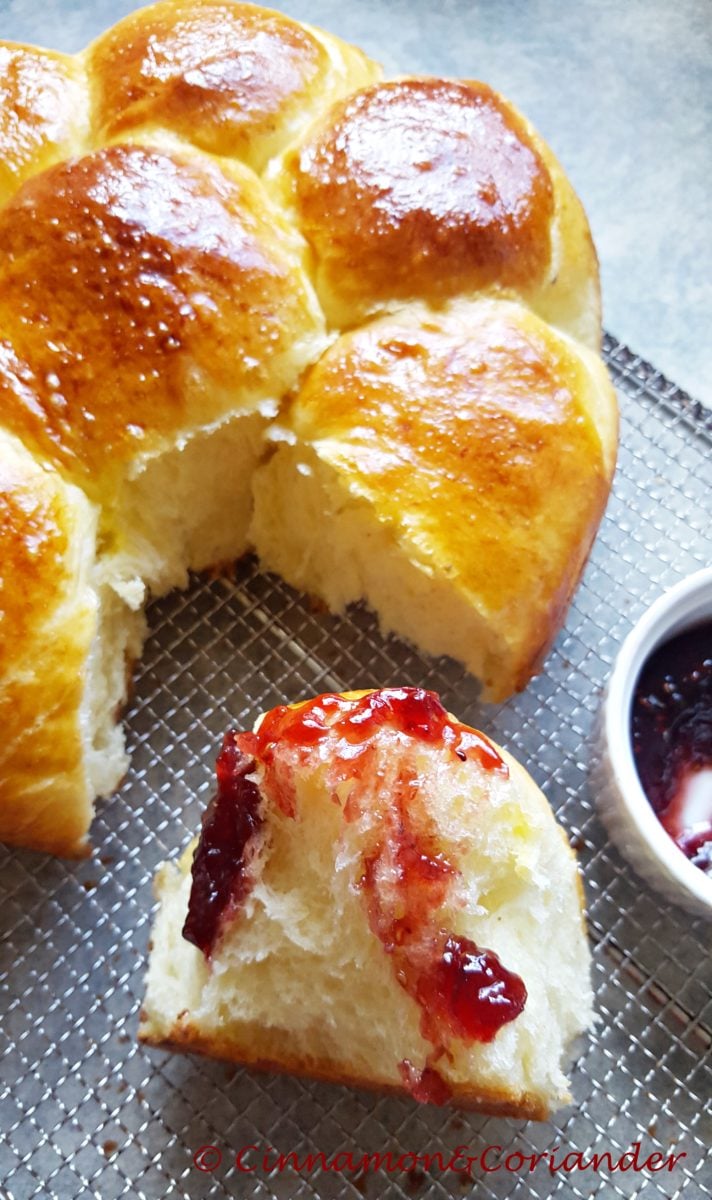
There is nothing more sensual than pulling a still slightly warm brioche bun from a freshly baked loaf of homemade brioche. It´s amazing how these buns can be so light and still so rich at the same time.
Baker’s Tips for making the best brioche:
Brioche can be a bit tricky to make and you should make sure you have a stand mixer available in your kitchen.
The dough could also be made by hand by working the butter into the wet dough and smearing them together against the counter and then getting it to form a ball by throwing it down on the workspace.
Yep, standmixer it is, right?
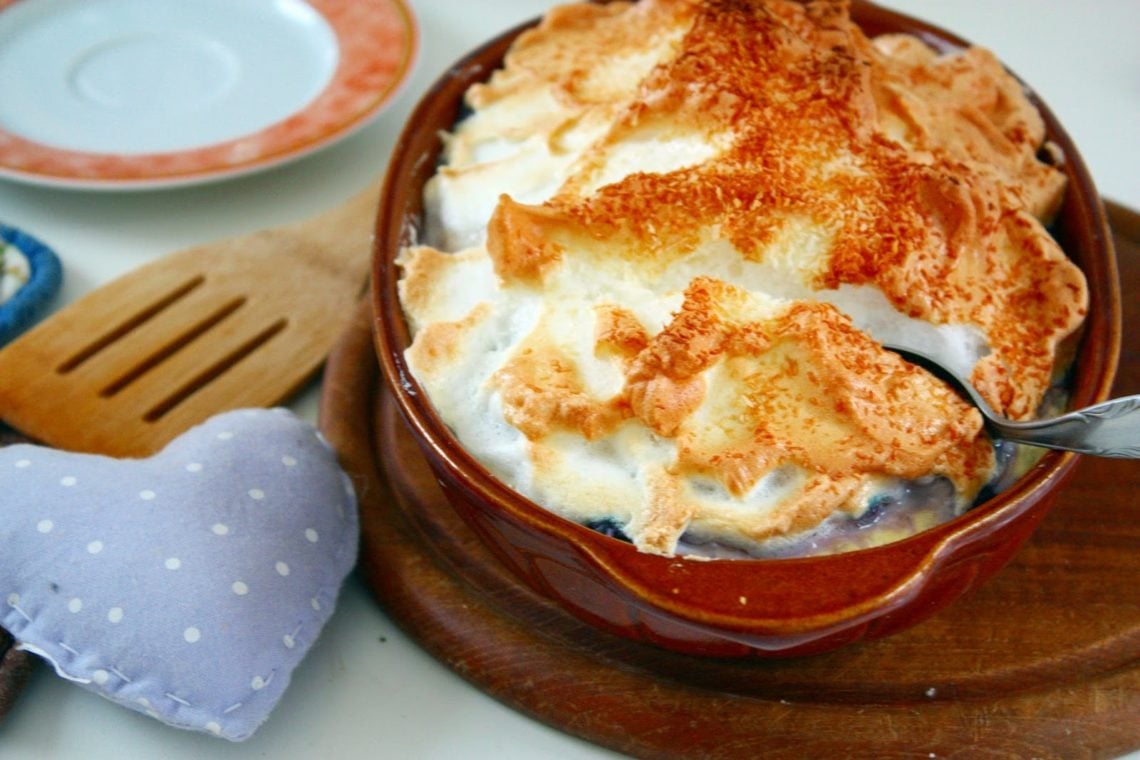
Brioche is best eaten the day it´s made. But there are also tons of amazing recipes for using up brioche leftovers! Think French Toast or bread and butter pudding.
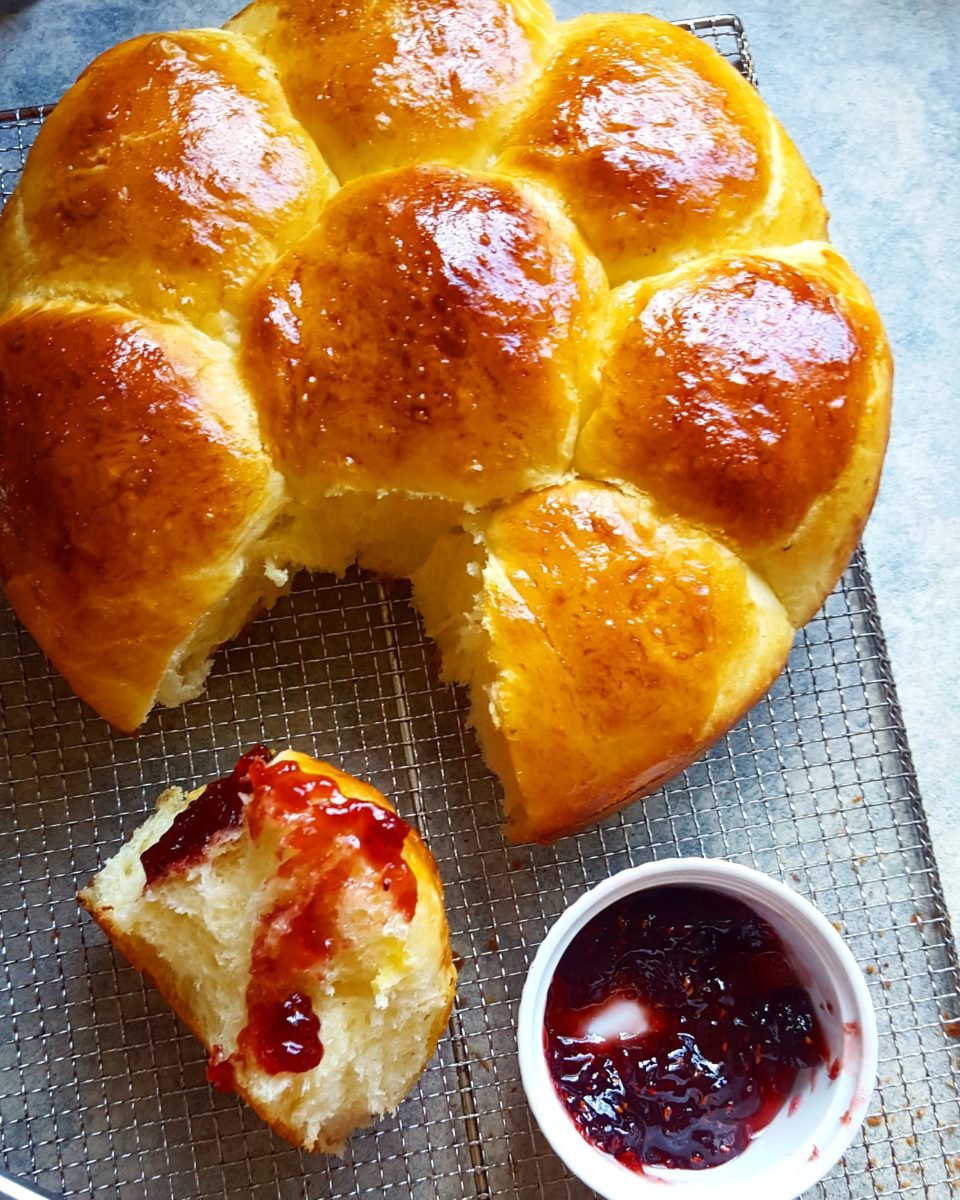
This Thomas Keller recipe for brioche loaf is a real treat and very much worth the effort ! Once baked, you don´t really need to add any butter to this brioche as it has a lot of heavenly butter flavour already.
A bit of raspberry jam takes it to the next level! There´s nothing better to get a lazy weekend or a holiday started.
In Germany, we bake a lot of complicatedly twisted and braided brioche loaves around Easter. I think this year I will start Easter Sunday with this Thomas Keller brioche recipe – or as we call it now: The Brioche Deluxe
★ Did you make and love this Bouchon Baker Brioche Loaf recipe? Give it your review below! And make sure to share your creations by tagging me on Instagram!

The best ever Brioche Loaf | A Thomas Keller Recipe (Bouchon Bakery)
This Thomas Keller recipe makes the most perfect brioche loaf. Buttery, fluffy, light and pillowy. And the best thing. I made it myself. You can do it, too.
Ingredients
- 122 g unsalted butter /4.3 ounces/little more than a stick
- 46 g whole milk 2.5 tbsp
- 136 g eggs about 3 L
- 270 g all-purpose flour scant 2 cups
- 6 g Instant/rapid-rise yeast 2 tsp
- 7 g salt 1 tsp
- 32 g sugar 2.25 tbsp
- 1 tbsp lemon zest optional, finely grated and added with butter
Instructions
-
First take out butter and eggs. Cut the cold butter into small chunks and measure out 122 grams worth on your scale. Crack the eggs into a mixing bowl and whisk. Strain the eggs into a small bowl on your scale until you reach 136 grams, then reset the scale and measure out the milk into the same bowl. Set the mix and the butter out on the counter until they come to room temperature.
-
Set up your stand mixer with the dough hook and add all of the dry ingredients and combine with your fingers. Add the egg/milk mixture to the mixer bowl. Turn the mixer on low (that's level 2 on the Kitchen Aid) and watch everything come together. When the dough starts to come together set a timer for 30 minutes and allow it to continue mixing. GO and do something else.
-
When the timer goes off, you should see a sticky mass clinging to the sides of the bowl and to the hook. Now, with the mixer still running, start adding your room temp butter a small handful at a time, waiting until the previous handful has been mostly mixed in before adding the next until all of the butter is added.
-
Stop the mixer for a second, scrape down the sides and bottom of the bowl with your spatula, and then turn the mixer back on low, mixing for another 10 minutes until the butter is fully incorporated and you have a shiny dough.
-
Spray a big bowl with nonstick spray. Scrape the dough out onto a clean work surface trying to tear as little as possible and keep it in one piece. Now, who feels like folding?
-
Ok, let's incorporate some folds here: Pat the dough gently into a rectangular shape just enough so that you can fold it on itself, using a light dusting of flour if necessary to keep the dough from sticking to your board. Take the right side and fold it over to cover 2/3 of the length of the dough, stretching the dough gently without tearing it.
-
Next, take the left side, lightly stretch it out, and fold it over. This is called an envelope fold. Repeat the patting, stretching and folding from top to bottom this time. When you're done, lift the dough up and put it into the greased bowl, seam-side down. Cover with plastic wrap stab the plastic wrap with a skewer and put in a warm spot for an hour. (see notes)
-
After the hour has passed, put it onto your floured counter again. Repeat the patting and folding (see above) Put the dough back in the bowl, cover it with the plastic wrap, and put it in the fridge overnight. Pfiuuu that was quite an ordeal, huh? Well, the worst part is over!
-
The next day, your dough will have doubled in size and will be cold and a bit stiff. Don't worry, it's not dead, just chillin'. It will be very easy to shape. Let the dough warm up a few minutes while you have your first coffee and flour your clean (!!!!! ) counter.
-
If you're making Nanterre, you can already get your two loave pans and spray them with nonstick spray.
-
Turn the dough out of the bowl onto the work surface and pat down the dough to remove any air bubbles. Using your knife, divide the dough into equal pieces. For loaves or nanterres measure out 12 dough balls of 50 grams each - for buns, 8 balls of 75 grams each Do this by halving your dough as best you can, then cutting into same sized portions. Or use your scale to check the exact weight. I eyeballed it. It worked fine.
-
Roll the portions up into smooth little balls: do this either in between your hands until they are as smooth as possible or,- even better - by rolling them in your hand against your work surface. It's best to use little to no flour.
-
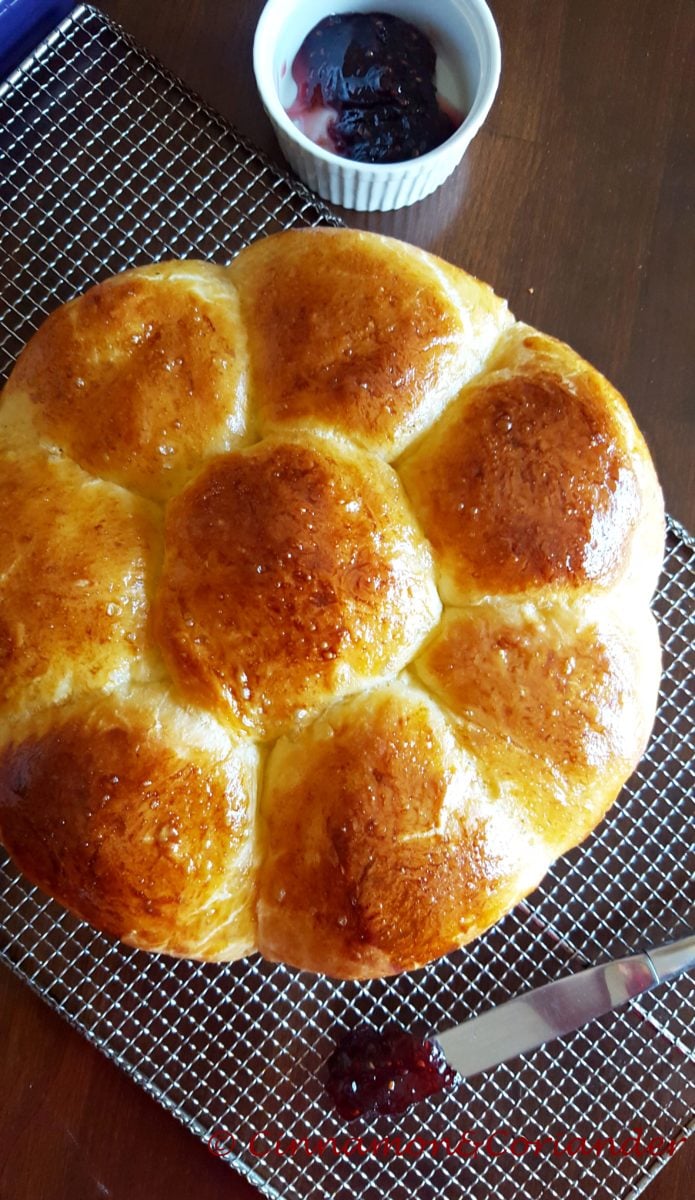
Place the rolled dough balls in the prepared loaf pans (6 to each one), or for buns space out all on a sheet. I baked mine in my 26 cm cake tin and created kind of a round decorative loaf. Looks stunning on a brunch table..
-
Ok, almost done. Now, Make an egg wash by beating an egg or two little ones with a whisk and strain through a fine mesh strainer into a clean bowl.
-
Brush each ball generously with the egg wash, cover the pans with a kitchen towel or plastic wrap (peak a whole in the foil) and set aside to do your final proof of *iknowthisisreallybadnews* another 2 1/2 hours. The dough balls should double in size. Keep the egg wash in the fridge. You will need it later. All you can do for now is preheat your oven to 350.
-
Brush the dough balls again with the egg wash and bake
-
Baking times depend on the size of your buns. I recommend 22 minutes for nanterre aka. loaves, and only about 12-13 minutes for buns. A thermometer in the center should read about 200 degrees and the buns should be richly browned, feel soft like a baby's cheek and smell like French heaven.
-
Transfer the loaves or buns immediately onto a wire rack to cool for at least 20 minutes. Oh yeah, twenty whole minutes. This is torture. It brakes my heart every time.
Recipe Notes
Here in Canada, the climate is not really optimal for proofing dough. I proof my dough in the microwave with the door ajar so that the light is on; The oven light works pretty well, too.


MEI JETZT bin gaaaaaanz motiviert,,,,des mecht i ausprobiern,,,,
am besten für mein OSTERTISCH,,,,freu,,,freu,,,,
hob no an feinen ABEND
bussale bis bald de BIRGIT
Hallo Kiki, hättest du netterweise das Rezept auch auf englisch? Diese krummen Angaben klingen nach Cups etc. Das wäre toll, vielen Dank!
Hallo Kiki!
Oh, wie bin ich froh, dass du heute dieses Rezept postest!! Ich habe nämlich gestern von meiner Mum den Auftrag bekommen einen Striezel o.Ä. zu backen, und da ich Brioche liebe, wollte ich natürlich einen Brioche-Laib backen. Nachdem ich nicht im Besitz eines Backbuches bin (nun ja, eines für Muffins und Cupcakes, aber sonst nichts) habe ich schon hin und her überlegt nach welchen Kriterien ich mich denn durch die vielen Internet-Rezepte wühlen soll.
Aber mit diesem Rezept wurde mir die Wahl abgenommen und ich kann mir zudem sicher sein, dass es super schmecken wird!
Vielen Dank und liebe Grüße,
Sophie
Oh wie lecker! Ich bin ja mit Paul Stefans Wunderteig schon den Brioche-Burgerbrötchen verfallen.
Aber die Brioche sieht noch ne Ecke fluffiger aus. Wird probiert und zu Ostern direkt in die selbstgetöpferten Förmchen gepackt…
Grüße nach Alberta! Ich hibbel hier schon, bis es im Sommer nach BC und Alberta zum Honeymoon geht ; ) Du hast Dir eine echte Traumecke der Welt ausgesucht, Hach!
Liebe Grüße, Line
Hi Kiki,
Update on my above post
After 8 hours 2nd proof, I finally had an acceptable rise, and though 4pm was a bit late for brunch,the brioche was tender and nice. I shared my lovely warm brioche with surprised neighbours , as by this stage ,just my husband and I at home and I couldnt see them unappreciated. They loved them,but Ive now gone and bought some INSTANT YEAST for this weekends baking adventure.
Hallo, ich wüsste gerne wieviel frische Hefe man braucht entsprechend 6 gr Trockenhefe.
Besten Dank!
Hi Kiki,
ich bin gerade über Dein Brioche-Rezept gestolpert und frage mich, ob bei dem Knetvorgang im Foodprozessor ein Knethaken zum Einsatz kommen muss — meiner hat nämlich keinen und ich müsste den Rührer verwenden.
Liebe Grüße,
Susanne
Hallo Kiki,
man klingt das spannend!!! Ich werde es auf jeden Fall nachbacken. Allerdings esse ich kein Weizen – meinst du, dass es auch mit Dinkelmehl so toll wird? Hast du vielleicht Erfahrung damit?
Ich danke dir!
Ik made this yesterday and it’s amazing. … slightly sweet and savory but incredibly delicate… fluffy like clouds and delicious. .. A little dry and crusty on the top where it’s important… This recipe really takes me back to my childhood, when a aunt of mine used to buy brioches filled with jam at a gourmet little bakery…just amazing recipe. .. I really recommend it… its brilliant
Mann, sind die gut!!!
Liebe Kiki, gerade hab ich 2 dieser traumhaft fluffig-weichen Brioches gegessen… inhaliert, besser gesagt. Ich musste heut früh aufstehen, weil die Handwerker im Haus sind, und da dachte ich: “probier doch mal die Brioches”, denn Zeit hatte ich ja. Ich hab um 8 Uhr angefangen mit dem Teig, alles so gemacht wie’s im Rezept steht, nur habe ich den Teig, nachdem die Butter drin war, nicht über Nacht im Kühlschrank gehen lassen, sondern knapp 2 Std. in der warmen Küche. Jetzt ist es kurz vor 13 Uhr, und ich kann die fertigen, lauwarmen, göttlichen Brioches genießen (hab sie in der Runde in der Springform gebacken) mit selbstgemachter Orangen-Marmelade… ein Gedicht!!
Tausend Dank für das tolle Rezept, es ist schon in meinem “Backen”-folder gespeichert.
Liebe Grüße, Lisa
Hallo Kiki, kannst du bitte genau sagen ob Kastenform / Springform vor dem backen eingefettet werden soll oder auch nicht, weil ziemlich viel Butter verarbeitet wird. Rezept klingt sehr spannend möchte unbedingt probieren!
Vielen Dank voraus,
Gruß,
Olga
Hallo Kiki,
teste grade dieses Rezept und frage mich, wie fluffig der Teig nach dem Kneten sein soll, da der andere Brioche-Teig, den ich gemacht habe, etwas fester war. Ich komme mit weichen klebrigen Teigen von der Verarbeitunge her auch gut klar – kenn ich vom Pizzabacken – möchte aber halt das ideale Ergebnis erzielen…
Ein Lob auch wegen der Tips zur Alkohol – und Kaffeeaufnahme! Das zeugt von großer Weisheit 😉
Grüssle Henner
Wo finde ich die erforderlichen Mengen der Zutaten? Danke Lg
Vielen Dank für dieses wunderbare Rezept ?
Das wird für den nächsten Sonntagsbrunch sofort ausprobiert ? vielleicht mit ein paar Bällchen mit Schokoladen Überraschung für die Kids?
Darf ich fragen, wird der Ofen auf Umluft oder Ober Unterhitze eingeheizt?
Vielen Dank für eine kleine Antwort
Ich freue mich schon sehr auf das backen ?
Herzlich,
Marie
Ich bin Hobbybäckerin und habe schon einige Brioche Rezepte probiert, aber dieses ist bei weitem das aromatischste und jede Minute der investierten Zeit wert! 5 Sterne auch für deine amüsante Art zu schreiben!
Unglaublich was sie hier für ein Rezept rsusgehauen haben. Habe alles eingehalten was sie sagten, jedoch konnte ich nicht widerstehen und habe es 2 mal je 40 min im Ofen gehen lassen und das Ergebnis ist unglaublich. Vielen Dank
Hey Kiki !
Ein toller Blog und tolles Rezept!
Ich habe mich erst kürzlich intensiv ins Backen verliebt und bin dabei hier hängen geblieben.
Ich habe mich, wie empfohlen, penibel ans Rezept gehalten. Dabei sind bei mir zwei fachliche Fragen aufgekommen.
Die erste ist, ob der Teig „zu lange“ in Kühlschrank sein kann ?
Und die Zweite:
Wie sehr kann ich den Teig am Ende vor seiner letzten 2,5 h Ruhephase kneten um ihn dann sozusagen zu formen? Man hat ja mühselig die ganze Luft hineingearbeitet. Da will ich es ja nicht raus kneten. Any advice ?
Danke nochmal für den tollen Beitrag. Alle waren begeistert !
Grüße aus Berlin !
Hallo Kiki
habe das Rezept nachgebacken und mich genau an die krummen Zahlen gehalten. Besser hätte es beim Bäcker auch nicht werden können und ich bin nicht die größte Bäckerin🙈 Das Brioche dauert zwar seine Zeit, ist aber jede Sekunde Arbeit wert. Hat keinen Tag gedauert bis nicht ein Krümelchen mehr übrig war. Vielen Dank, auch für die “idiotensichere” Erklärung👼.
LG
Undine
I love abou hon.. his book is excellent. This bread is one of the best Brioches I’ve made. His other breads are great too. I love making guns with it, sprinkling course sugar on top, bake. Then I split and fill with a layer of apricot then pastry creme. A sprinkle of powdered sugar…soooo melt in your mouth delish!
Wow. Ein Superbrioche mit wundervollem Duft und toller Struktur. Der Aufwand lohnt! Ich habe beim 2.Mal etwas mehr Zucker dazu gegeben.
Thank you for giving us Kitchen Aid settings and times for mixing this dough – l always have to make big guesses when making other recipes! I’m making your recipe for Easter brunch, starting a day early and hoping that my timing will work out well… wish me luck! Happy Easter to you and yours!